
Last updated November 15, 2026
 Metal roofing
 Architectural shingles
 Tile roofing
 GAF
 Owens Corning
 Flat & low-slope
Free roof inspection with deck photos before we talk money - GAF and Owens Corning certified installation
Roofing Emergency Preparedness Guide for Spring Valley Homes
Most homeowners think the danger passes when the rain stops. In Spring Valley, that’s when the real clock starts. The wind-driven monsoon storms that roll through the valley in July, August, and September usually leave behind a small, quiet breach: a lifted shingle, a cracked pipe boot, a hairline gap in the flashing. Water gets in slowly, and the damage that follows doesn’t look like storm damage to an insurance adjuster. It looks like neglect. This guide is built around that narrow window. You’ll learn the first-hour response sequence, how to tarp a roof so it actually holds in valley wind, what documentation to have ready before storm season, and how to tell a legitimate roofing contractor from a storm-chaser. Every step here is written for Spring Valley homes and the specific weather they face.
Quick Answer
After storm damage in Spring Valley, you have roughly 48 to 72 hours to stop water intrusion and document everything before secondary damage gets reclassified by insurers as a maintenance failure rather than a covered storm loss. The correct response is: check the interior for water first, photograph everything before touching it, apply a properly anchored emergency tarp, and get a documented roof inspection as soon as possible. Preparation before storm season, not reaction after it, is what separates a covered claim from a denied one.
Styles & brands we work with
- Architectural shingles
- Metal roofing
- Tile roofing
- GAF
- Owens Corning
- Flat & low-slope
Table of Contents
- The First Hour After Storm Damage
- How to Tarp a Roof Correctly in Spring Valley Wind
- The Documentation Package to Build Before Storm Season
- How to Spot a Storm-Chaser After a Weather Event
- What Monsoon Damage Looks Like by Roof Type in Spring Valley
- How Insurers Evaluate Storm Claims and Failure to Mitigate
- Pre-Season Roof Prep Checklist
- When It’s Time to Call a Professional Roofer
The First Hour After Storm Damage
The first hour is about gathering evidence, not fixing things. Every action you take after a storm either strengthens your insurance claim or weakens it, and the difference usually comes down to the order in which you do things. Here’s the sequence we recommend to every Spring Valley homeowner who calls after a storm.
- Check the interior first. Walk the house from the top floor down. Look at ceilings, especially near exterior walls, in closets, and around chimney chases. Water stains, bubbling paint, and sagging drywall are the earliest signs of intrusion. In Spring Valley’s single-story ranch homes, ceiling stains often appear far from the actual breach because water travels along the roof deck before finding a path down.
- Photograph everything before you touch it. Ceiling stains, wet carpet, displaced attic insulation, and standing water all matter. Take wide shots that establish location and close-ups that show detail. Timestamped phone photos are fine.
- Stop interior water if it’s safe to do so. Place buckets under active drips. Move furniture and electronics out of the path. Do not climb onto a wet roof, especially in wind. Roof falls are the leading cause of storm-related injuries, and no ceiling stain is worth the risk.
- Check the attic if you can access it safely. Look for daylight through the roof deck, wet insulation, and water staining on the rafters. If the attic is wet, don’t walk across the insulation; it loses structural integrity when saturated.
- Document the exterior from the ground. Photograph missing shingles, lifted edges, dented vents, and debris accumulation. Use binoculars or zoom if needed. Do not get on the roof.
- Call your insurer and open a claim. Report the damage the same day. Note the date and time of the call and the claim number. Insurance timelines start from the report, not the storm.
- Call a roofing inspector. Get a professional inspection on record as soon as possible. A documented assessment from a roofing-only company carries far more weight with an adjuster than a homeowner’s photos alone.
Every one of these steps protects the claim. Skipping the documentation or waiting a week to report gives an adjuster grounds to argue the damage was pre-existing. In Spring Valley, where monsoon storms are a known annual event, insurers scrutinize the timeline closely.
How to Tarp a Roof Correctly in Spring Valley Wind
An emergency tarp is not a permanent repair. Its only job is to keep water out for a few days until a proper fix can be scheduled. But in the wind that accompanies a Spring Valley monsoon, a poorly applied tarp will flap loose, come off entirely, or cause damage of its own by abrading shingles or pulling on flashing. Getting the anchoring right matters more than the tarp material.
Safety First
If the roof is steep, wet, or higher than you’re comfortable with, stay off it. Weather-related roof falls cause serious injuries every year, and no tarp is worth that risk. Call us instead. Telescoping poles and tarp kits allow you to cover some damage from the ground, but only when the slope is gentle and the reach is safe. When in doubt, don’t go up.
Tarping a Pitched Roof
- Size the tarp to overhang the damage by at least three feet on every side. A tarp that stops at the edge of the damaged area will let water wick underneath.
- Anchor at the high point first. Run a line of screws through the tarp and into the top of the roof deck above the damage line, so water runs down the tarp and over the breach. Never anchor only at the bottom; the whole thing will lift in the first gust.
- Run the tarp downslope, past the eave. It should overhang the edge by several inches so water clears the fascia rather than running back under the tarp.
- Anchor the sides with screws through the tarp into the deck, spaced a few feet apart. In Spring Valley’s gusty monsoons, side anchoring is what keeps the tarp from becoming a sail. Use washers under the screws to spread the load; bare screw heads tear through the tarp the first time the wind catches it.
- Weight the bottom edge only with sandbags or filled buckets placed on the tarp where it lies on the roof surface. Never place weights where they can slide off, and never hang weight from the eave. Hanging weight pulls on the fascia and can damage gutters and soffits.
Tarping a Flat or Low-Slope Roof
Flat and low-slope roofs, common on many Spring Valley commercial and residential additions, need continuous overhang and weights rather than screws. Lay the tarp so it extends past the edge on the low side. Weight the perimeter with sandbags, spaced evenly. Do not place a single heavy object in the center; that creates a low spot where water pools and the tarp fails. If a flat roof is ponding, that’s a drainage problem as much as a leak problem, and it needs professional attention.
A tarp is a stopgap, not a fix. Even a good tarp should be followed by a proper repair within days, not weeks. When you’re ready for the real fix, see our roof repair page for what that process looks like.
The Documentation Package to Build Before Storm Season
The homeowners who get claims approved cleanly are the ones who did the paperwork before the storm, not after. Building a documentation package takes an afternoon and pays off enormously when an insurance adjuster starts looking for reasons to deny. Do this before July, every year, in Spring Valley.
- Photograph the whole roof from the ground annually. Use zoom or a drone if you have access to one. Wide shots of each roof plane, close-ups of flashings, valleys, and penetrations. Date the photos and store them in a folder labeled by season and year.
- Keep every repair and maintenance record. Receipts, invoices, work orders, inspection reports, and warranty documents all matter. An adjuster who sees a documented maintenance history is far less willing to claim the damage was neglect.
- Record the age and type of your roof. Material, approximate installation date, and any manufacturer information. GAF, CertainTeed, Owens Corning, and the other brand lines we install all have different lifespans and warranty structures; knowing which one is on your roof matters when a claim is disputed.
- Keep a running repair and pay-attention list. Note any minor issue you’re tracking: a small leak in the garage during last season, a loose gutter, a lifted shingle. Carry these forward each year so you know what’s new damage and what’s pre-existing.
- Build a contractor contact list. Have the number for your roofing company saved in your phone and on paper. After a major storm, every roofer in the valley is fielding calls; the homeowners who reach out first get scheduled first.
- Store a copy of your insurance policy and declarations page. Know your deductible, your coverage limits, and your policy’s language on water intrusion if you can find it. This tells you what you’re actually filing for.
This package does two things. It gives you a clear starting point for any claim, and it gives a roofing inspector something to compare against when documenting new damage. When we walk a roof in Spring Valley and the homeowner has stored annual photos, we can almost always show the adjuster exactly what changed and when.
How to Spot a Storm-Chaser After a Weather Event
After a major monsoon event in Spring Valley, out-of-state trucks appear in neighborhoods within days. Some are legitimate; many are not. The pattern is well documented in the roofing trade. Storm-chasers move in after a weather event, knock on doors, offer “free inspections,” and pressure homeowners to sign contracts before they’ve even seen the roof. Sometimes they do the work. Often they collect a deposit and disappear.
The good news is that distinguishing a real roofing contractor from a storm-chaser comes down to a handful of direct questions. Ask them, and pay attention to whether the answers are specific or evasive.
- “Can I see your state contractor’s license?” In Nevada, roofing contractors must hold a valid state license. Ask for the number and look it up. A real roofer will hand it over without hesitation. A storm-chaser will change the subject.
- “Can I see proof of insurance and bonding?” Any legitimate roofing contractor carries both. If a crew works on your roof without coverage and gets hurt, you can be liable. Require the certificate before any work begins.
- “Where is your local office, and what’s the address?” Ask plainly. A real local roofer will give you an address. A storm-chaser working out of a motel room won’t, or they’ll give a vague answer about being “in town for the season.”
- “Will you put the estimate in writing before any work starts?” Every legitimate estimate is written, line-itemed, and provides a fixed price. Verbal quotes are a warning sign, no matter how good they sound.
- “Will you pull the permit?” Most jurisdictions, including Spring Valley and Clark County, require a permit for structural roof work. A contractor who suggests skipping the permit is protecting their own schedule, not your home.
- “What is your warranty, and who honors it?” Manufacturer warranties only remain valid when installation follows the manufacturer’s specifications. Ask for the warranty in writing and who honors it if the installment company disappears.
- “Did you knock on my door, or did I call you?” This is more of a gut check than a question. There is nothing wrong with a roofer doing neighborhood outreach after a storm. There is everything wrong with a contractor who pressures you to sign a contract for tens of thousands of dollars inside a 20-minute conversation on your porch.
One more sign: legitimate contractors welcome an inspection-first approach. If the person at your door wants to skip straight to a replacement quote without a documented assessment, walk away. We always start with a documented Roofing Spring Valley inspection because a proper diagnosis has to come before any recommendation.
What Monsoon Damage Looks Like by Roof Type in Spring Valley
Monsoon damage in Spring Valley isn’t uniform. It presents differently depending on what’s on your roof, and knowing where to look saves time when you’re trying to figure out whether you have a real problem or a cosmetic worry. Here’s what we see most often by roof type.
Asphalt Shingle Roofs
The most common residential roof in Spring Valley and the most susceptible to monsoon wind. Wind-driven rain from the south and east can lift shingle tabs at the eave and along ridges, especially on the windward side of the home. Look for shingles that are creased, missing, or sitting slightly raised. Granule loss is common after a hard storm and shows up as dark patches in gutters and at downspout outlets. On older shingles, the seal strips that hold tabs down can fail entirely, and the first strong gust peels whole sections back. When we install shingles from brands like GAF or Atlas, high-wind-rated products are part of the conversation, and worth asking about before you need them.
Tile Roofs
Tile is durable against sun but vulnerable to impact and movement in wind. Monsoon storms can crack individual tiles, and while a single cracked tile doesn’t always leak immediately, it can allow water in during the next storm. In Spring Valley, the underlayment beneath the tile matters more than the tiles themselves for water protection; an older underlayment may fail even when the tiles look intact. Look for displaced tiles, visible cracks, and any area where the tile courses appear misaligned.
Flat and Low-Slope Roofs
Flat roofs, common on additions, patios, and some commercial structures in Spring Valley, fail in monsoon season mainly because of drainage. Wind-driven rain overwhelms a slow drain, water ponds, and the seams in the membrane become the weak point. Look for standing water more than 24 hours after the storm, blistering on the surface, and seams that are lifting or have become soft. A flat roof that ponded during the last storm is already a maintenance problem, whether the interior is wet or not.
Metal Roofs
Metal holds up well in monsoon wind, but the failure points are the penetrations and the fasteners. Wind-driven rain finds its way in around vents, skylights, and any screw that has backed out or lost its sealing washer. Look for missing or backed-out fasteners along the ridges and near penetrations, and any sign of water streaking down the roofing panels themselves.
Across all roof types, the damage that leads to denied insurance claims is rarely dramatic. It’s the small, easy-to-miss breach that takes days or weeks to show up as an interior stain. If you suspect something, even if you can’t see it clearly, get it inspected before the damage has time to amplify. For what a proper inspection covers, see our Spring Valley service page.
How Insurers Evaluate Storm Claims and Failure to Mitigate
The phrase that sinks more roofing claims than any other is “failure to mitigate.” It means the homeowner didn’t take reasonable steps to stop further damage after a covered event. An adjuster who concludes that water entered during a storm but was allowed to keep entering for weeks has grounds to deny the resulting interior damage, even when the original breach was clearly storm-related.
Nevada insurers can and do deny interior water damage claims when the loss occurs well after a documented storm event, because the secondary damage is arguably the homeowner’s responsibility to prevent. The key word is “documented.” A storm without a report is not a documented event; a storm with an insurance report, dated photos, and a roofing inspection report is hard to argue with. That’s the documentation package doing its job.
What an adjuster actually looks at in a storm claim:
- The timeline. When did the storm occur, when did water first appear, when did the homeowner report the claim, and when was a professional inspection done? Long gaps weaken the claim.
- Evidence of the breach. Photographs or inspection notes showing the specific damage (missing shingles, cracked flashing, displaced tiles) that allowed water in.
- Evidence of mitigation. A tarp on the roof, photos of interior water before it was cleaned up, and a documented response no more than a few days after the storm.
- Maintenance history. If a roof has been maintained and inspected, the adjuster has far less to work with to claim neglect. If there’s no maintenance history at all, expect the claim to be harder.
- The type of damage. Storm damage (wind lift, impact) is covered. Wear and tear, age, and long-term deterioration are not. The line between the two is exactly where a documented inspection matters most.
Mitigation doesn’t require heroics. Calling your insurer, photographing the interior, putting a tarp up safely, and scheduling an inspection within two or three days is enough to demonstrate reasonable response. The homeowner who waits until the drywall is soft and mold has started has a much harder case.
When a replacement is the right answer rather than a repair, our roof replacement page walks through how that decision gets made and what the process looks like.
Pre-Season Roof Prep Checklist
The best emergency response is preparation that means you never need one. Spring Valley’s monsoon season arrives like clockwork, and the work that dramatically reduces the chance of storm damage happens in the months before. This is a simple checklist; nothing on it requires climbing onto a wet roof.
- Get a documented inspection in late spring. A professional inspection in April or May catches the small issues (loose flashing, worn seals, clogged drains) before the monsoon amplifies them into leaks.
- Clear gutters and downspouts. A clogged gutter on a pitched roof means water runs back under the eave and into the fascia. On flat roofs, a clogged drain means ponding. Clean them before July and again mid-season.
- Check and tighten visible fasteners on metal roofs. Backed-out screws are the most common way water enters a metal roof, and they’re easy to catch early.
- Inspect attic insulation and ventilation. Adequate ventilation moves heat and moisture out of the attic, which extends the life of the roof deck and makes wet intrusion easier to spot early.
- Trim trees back from the roof line. Branches contacting the roof can lift shingles and provide a path for debris to accumulate in valleys where water already tends to pool.
- Build or refresh the documentation package. Annual photos, repair history, insurance declarations page, and a saved contractor contact list. See the section above for the full package.
- Confirm your attic access is safe and clear. You may need to check the attic during or right after a storm, and you don’t want to be moving boxes in the dark.
- Know your roofer’s number. Save (877) 851-0738 in your phone and write it on a piece of paper. After a major storm, the internet may be saturated with storm-chasers and slow from traffic.
This checklist is short. Two afternoons, spread across spring, will do more for your roof than a full week of panicked calls after the first storm hits. We install products from seven leading brands, including Atlas, Tamko, Boral, and GAF, and matching the right product to your roof profile happens best before the weather does, not during.
When It’s Time to Call a Professional Roofer
Some roof issues wait. Others don’t. Call a professional when any of the following is true: there is active water intrusion inside the home, you see damage after a storm that involves missing shingles, cracked tiles, or displaced roofing, or you can’t safely inspect the roof yourself. Also call when the roof is past its expected lifespan and you’re weighing repair against replacement; a proper inspection gives you a documented basis for that decision instead of a guess.
Don’t call a roofer to pressure you into a replacement you don’t need; call one who will tell you plainly whether a repair is the right answer. We’ll tell you when a repair is the right answer and when it isn’t. Roofing Spring Valley offers free estimates in Spring Valley. Call (877) 851-0738. We answer 24/7. Fast dispatch from 7am to 7pm, Sunday through Friday. We’re closed Saturday. Our technicians have up to 13 years of experience, and we work strictly in roofing: repair, replacement, and inspection only, with documented findings before any work begins.
See the difference
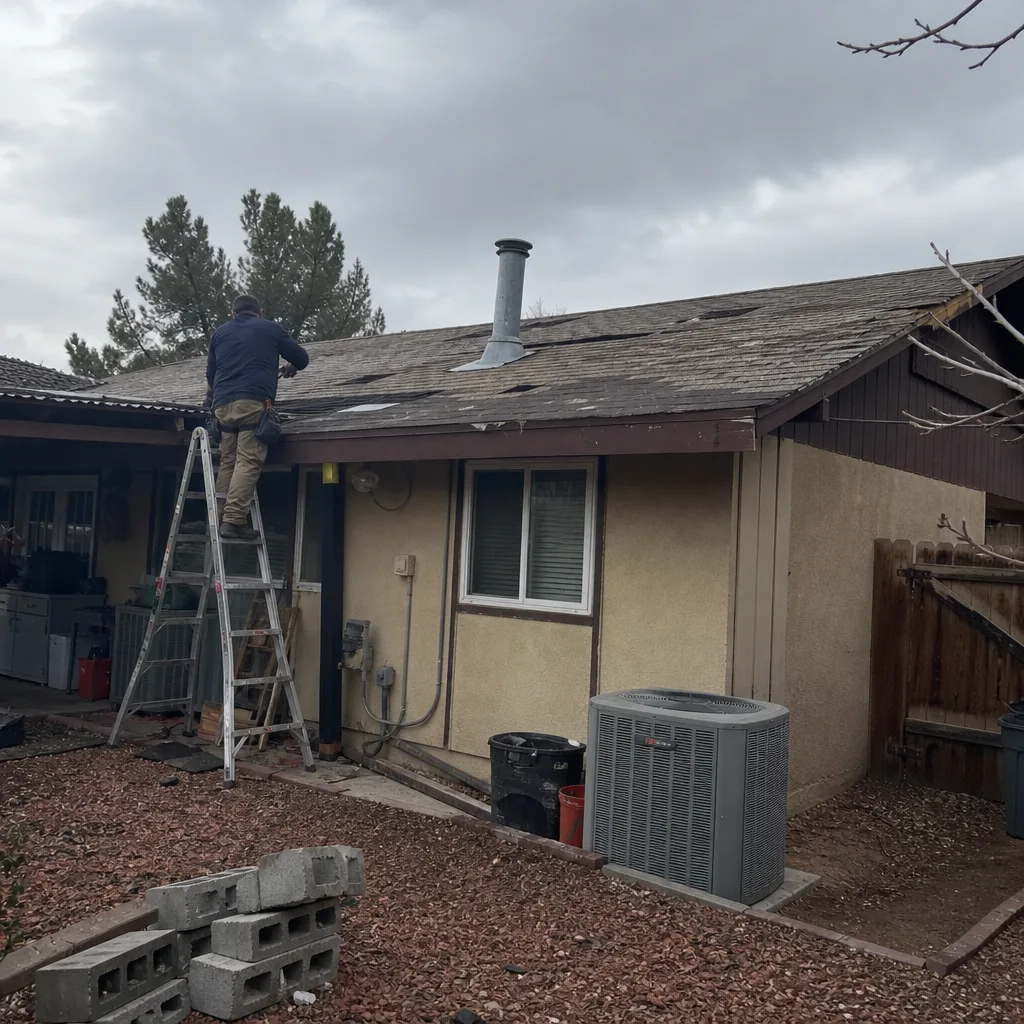 Before
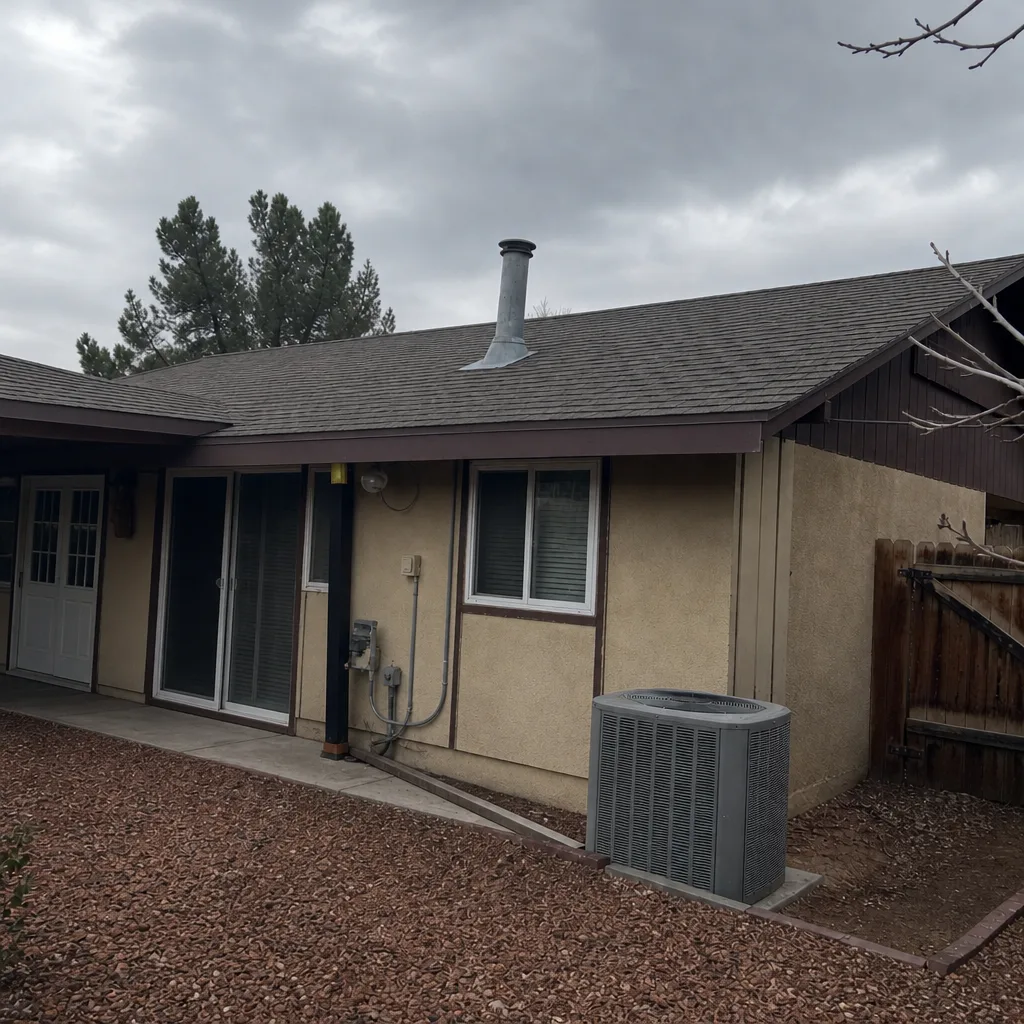 After
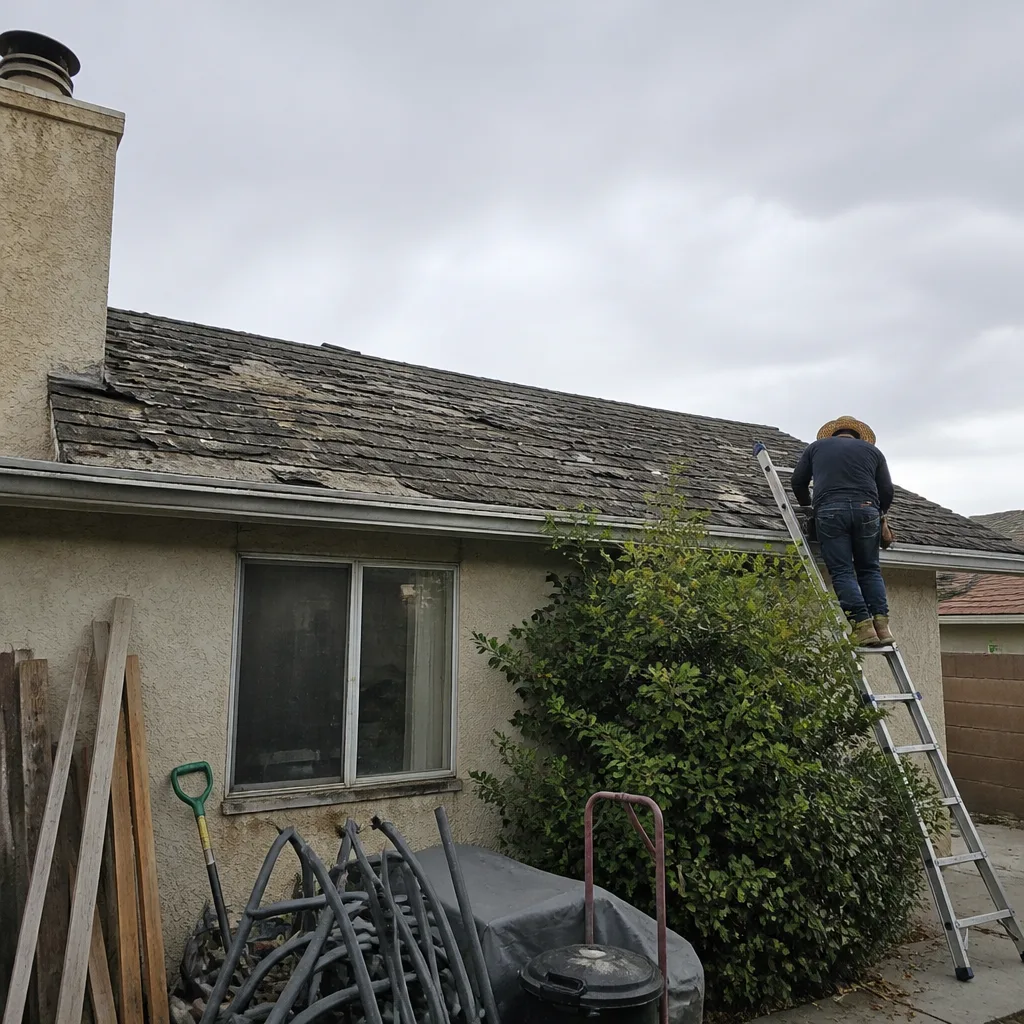 Before
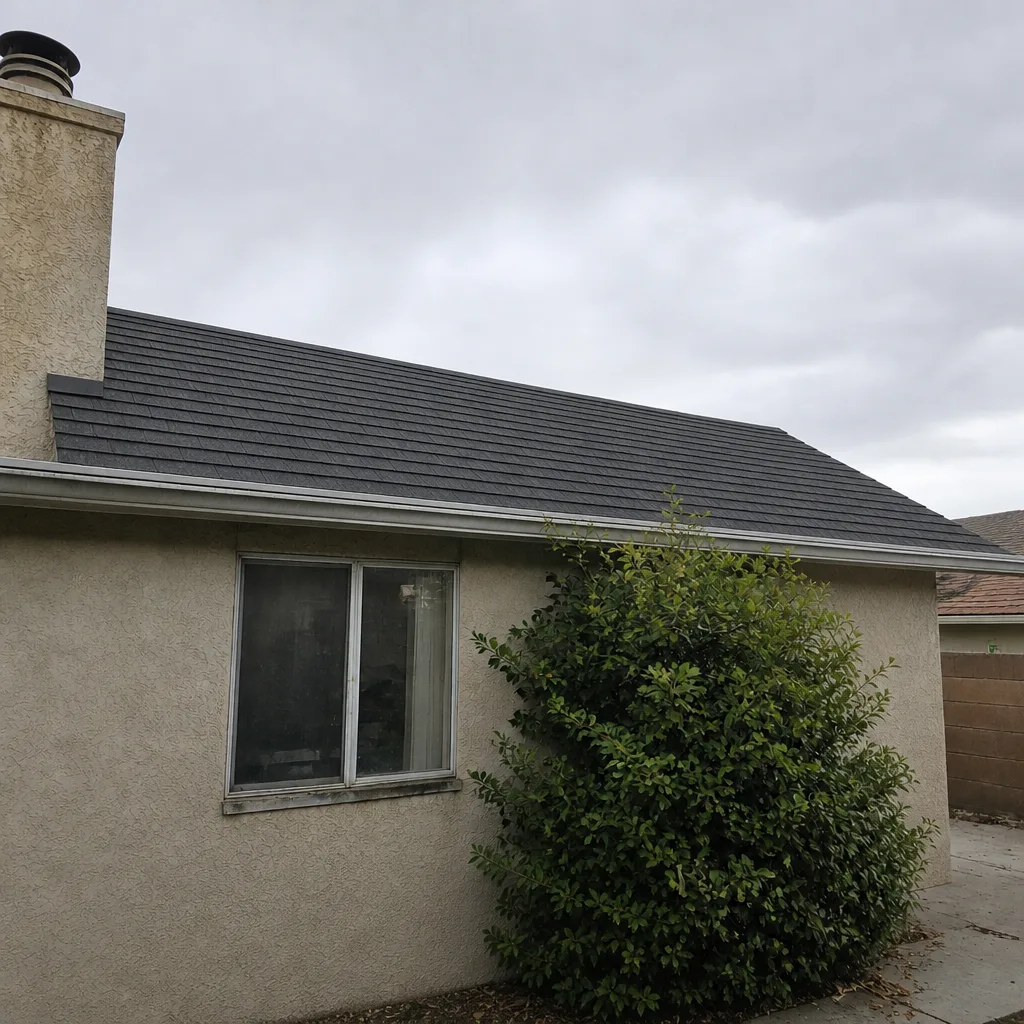 After
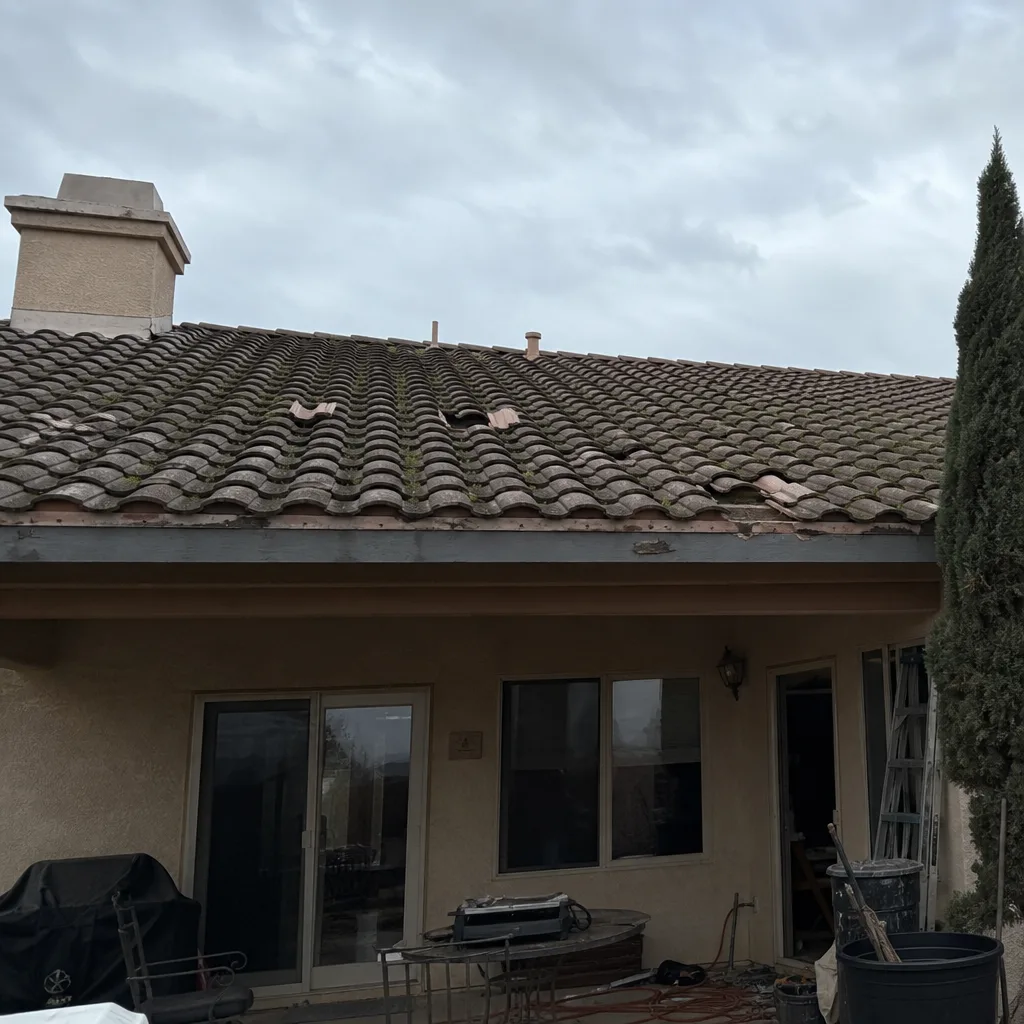 Before
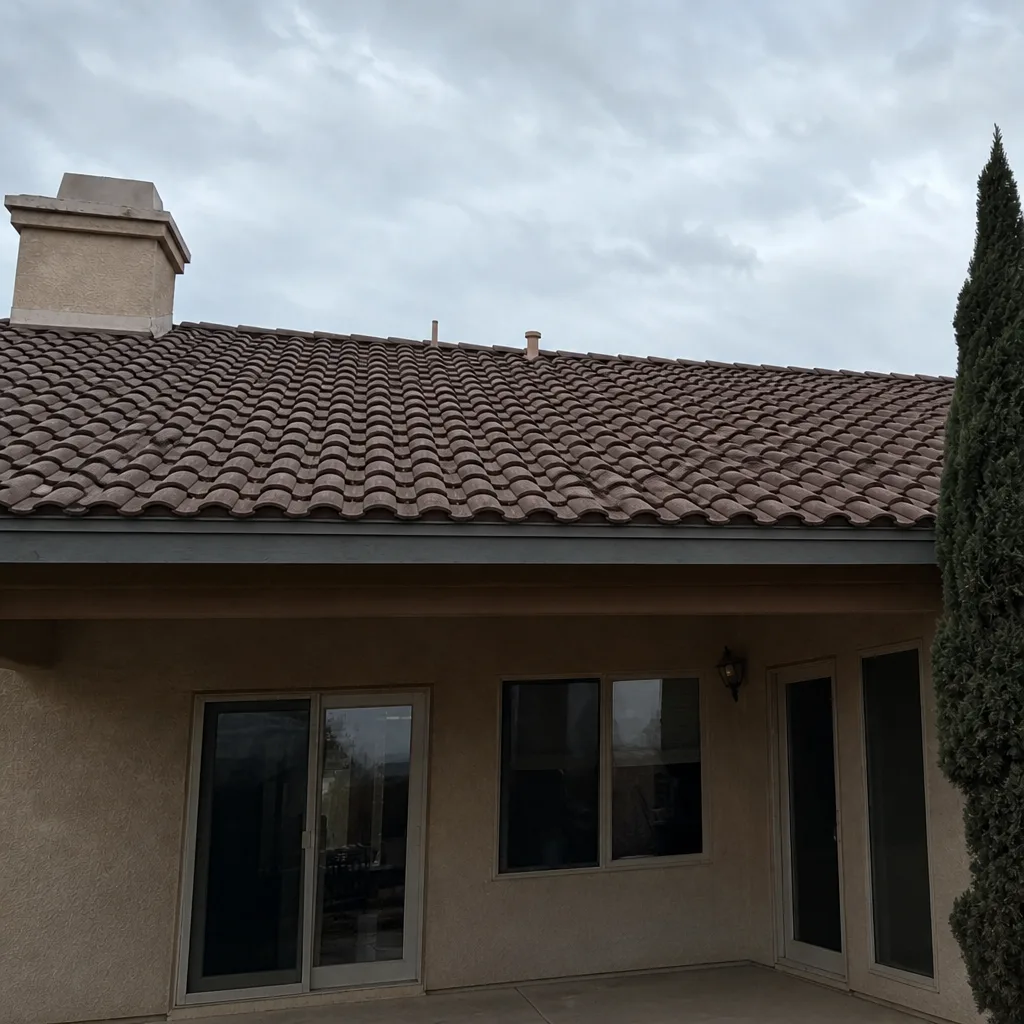 After
Frequently Asked Questions
You have roughly 48 to 72 hours after a storm to stop water intrusion and document everything before insurers can argue the resulting damage is a maintenance failure rather than a storm loss. Reporting the claim, photographing the interior, tarping safely, and getting a professional inspection within that window protects the claim. Call (877) 851-0738 for an exact assessment; estimates are free.
If you can do it safely from the ground or from a flat, low-slope porch without climbing, tarping yourself in the first day is reasonable and good for your claim. If the roof is steep, wet, or higher than one story, wait for a professional. Roof falls cause serious injuries and no tarp is worth that risk. Call (877) 851-0738 to schedule an inspection; estimates are free.
Not automatically, but not having a pre-storm inspection makes the claim much harder to defend. An adjuster will look for any reason to argue the damage was pre-existing, and without prior photographs or inspection records you have no evidence to counter that. Getting an inspection now gives you a documented baseline going forward. Call (877) 851-0738; estimates are free.
Check the interior ceiling first, especially near exterior walls, in closets, and around the chimney chase. Water travels along the roof deck before it shows up, so ceiling stains often appear far from the actual breach. Photograph anything you see before cleaning up, then check the attic if you can access it safely. Call (877) 851-0738 to schedule a professional inspection; estimates are free.
Ask for their state contractor’s license number, proof of insurance and bonding, a local physical address, a written estimate, and confirmation that they’ll pull the required permits. A legitimate contractor provides all of these without hesitation. A storm-chaser gives vague answers and pressures you to sign before an inspection. Call (877) 851-0738 for a documented inspection before you commit to any repair or replacement; estimates are free.
We handle roofing repair, roof replacement, and roof inspection, and we start with a documented assessment. Call (877) 851-0738. We answer 24/7. Fast dispatch from 7am to 7pm, Sunday through Friday. We’re closed Saturday. A call outside dispatch hours is booked into the next opening. Estimates are free, and the price is set per job by the written estimate.
Common Mistakes to Avoid
- Waiting a week to report the claim. Insurance timelines start when you report, not when the storm hit. A delay gives an adjuster a simple argument that the damage could have happened any time after the event, and was left too long to mitigate. Report the same day if you can.
- Climbing onto a wet, wind-blown roof for a look. This is the most dangerous mistake on the list. Roof falls are the leading cause of storm-related injury, and a wet shingle roof in Spring Valley after a monsoon has almost no traction. Stay on the ground; use binoculars.
- Cleaning up the interior before photographing. Wet carpet, ceiling stains, or standing water that gets cleaned up before it’s documented is damage that doesn’t exist to an adjuster. Photo everything first, then clean.
- Signing with the first contractor at the door. Storm-chasers in Spring Valley target neighborhoods right after a major event. Ask for license, insurance, and a local address before any conversation goes further. If you’re asked to sign a contract on the porch, walk away.
- Letting a tarp stay up for weeks. A tarp is a stopgap. It can abrade the shingles underneath and trap moisture if it’s left in place past a few days. Schedule the actual repair right after the tarp goes on.
- Skipping the permit. Most structural roof work in Spring Valley and Clark County requires a permit and an inspection. An unpermitted repair can complicate insurance claims, complicate a future sale, and put your warranty at risk. Require the permit.
- Replacing a whole roof when a repair would do. After a storm, some contractors will quote a full replacement for damage that a proper repair would fix. Get an inspection first; an honest roofer will tell you which answer is right.
The Bottom Line
Storm damage in Spring Valley is rarely a single dramatic event. It’s a small breach, a bit of water, and then a claim that gets denied because the homeowner didn’t act in time. The window is roughly 48 to 72 hours, and the correct response has a clear order: check the interior first, photograph everything, follow the claim-reporting steps, get a properly anchored tarp on if it’s safe, and schedule a documented inspection. Preparation in the spring does most of the work; the documentation package, the pre-season checklist, and the trusted roofer’s number already saved all mean less panic, and fewer denials, when the first monsoon hits. We work in roofing only: repair, replacement, and inspection, with the findings documented before any decision is made.
If you’ve had storm damage, or if you’re preparing now and want a documented baseline before the season, call us. Roofing Spring Valley, free estimate: (877) 851-0738. We answer 24/7. Fast dispatch from 7am to 7pm, Sunday through Friday. We’re closed Saturday. We install products from seven of the industry’s leading brands, including GAF, CertainTeed, Owens Corning, IKO, Atlas, Tamko, and Boral, so the recommendation matches your roof and your budget, not one supplier’s shelf.
Written by the team at Roofing Spring Valley.